AutoPlay not working on Windows 11/10
Here is a list of all the effective solutions to try if AutoPlay is not working on your Windows 11/10 computer:
AutoPlay dialog box not showing?
1] Enable the AutoPlay feature again
There can be a temporary glitch in why the AutoPlay feature is not working on your Windows PC. In this case, you can re-enable the feature to solve the problem. Here are the steps you need to follow to do so. Check if it makes any difference. If not, try the next solution.
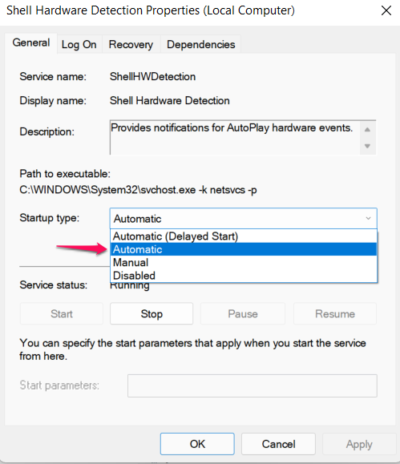
2] Change Shell Hardware Detection service
AutoPlay will not work on your Windows PC if the Shell Hardware Detection service is disabled. So, manually enable the service and check if it solves the problem. You can do so by following the below steps. Check if the problem is fixed or not. See: How to Limit Media Autoplay in Microsoft Edge browser
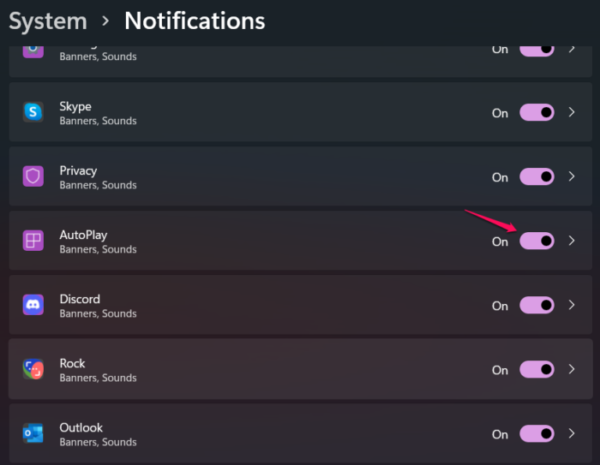
3] Enable AutoPlay notification
The mentioned problem will occur if AutoPlay is disabled under Windows notification settings. You will have to enable AutoPlay notification to solve the problem. Here’s how it’s done. That’s it. Check if you are still facing the problem or not.
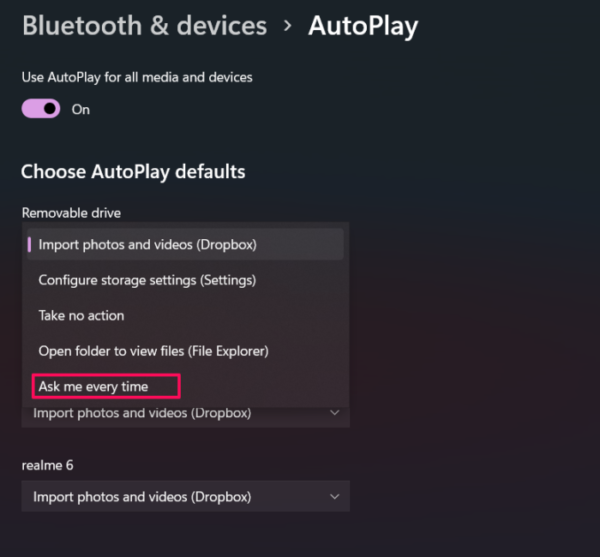
4] Change AutoPlay settings
Misconfigured AutoPlay settings can also be a primary reason behind the problem in the question. You will have to change the settings to solve the problem. Here’s how. Now, plug in the device and check if the AutoPlay feature is working. See: How to disable or stop Video Autoplay in Microsoft Edge
5] Change Local Group Policy
You can use the Local Group Policy to solve the problem as well. Misconfigured policy settings will disable AutoPlay on additional types of drivers. Here are the changes you need to make in the editor to solve the problem. Restart your system and check if the problem is solved or not. Read: How to prevent AutoPlay from remembering User Choice
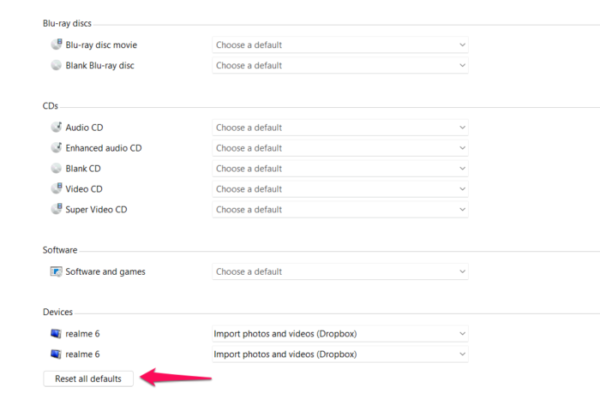
6] Reset the AutoPlay settings
If none of the above solutions were helpful, the last thing you can try is to reset the AutoPlay settings. To do so, follow the below steps. Restart your system, and you will see that you are no longer facing the problem.
How do I disable AutoPlay in Windows 11?
It’s very easy to disable AutoPlay in Windows 11. Go to Settings > Bluetooth & devices > AutoPlay. Disable the toggle that says use AutoPlay for all media and devices. You can even use Control Panel to do the same. For more information, check out our dedicated guide on how to enable or disable AutoPlay in Windows 11/10.
How do you reset AutoPlay?
You can reset AutoPlay using the control panel of your Windows PC. Here are the exact steps you need to follow – Open the Control Panel on your system > Change View by to Small/Large icons > Select AutoPlay. Click on Resel all defaults option present at the bottom of the screen. Read Next: Enable, Configure and set AutoPlay defaults in Windows 11/10.