Quick Actions lets you perform actions quickly on your often accessed functions or features. These could be All settings, Connect, Battery saver, VPN, Bluetooth, Brightness, Note, Tablet Mode, Wi-Fi, or Quiet Hours. You can select or choose the Quick Actions you want to be displayed here.
How to Arrange Quick Action Buttons in Windows 10
If you want to change how the Quick Action buttons are displayed:
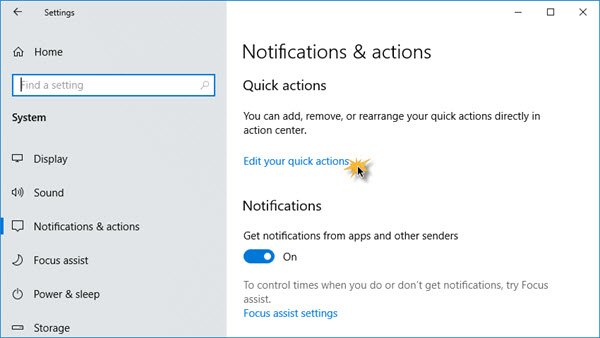
Open the Start MenuClick on the Settings icon.Next click on System settingsFrom the left panel, select Notifications & actions.Click on the Edit your quick actions link and the Notification & Action center will pop out from the right side.
Add, Remove Quick Action Buttons in Windows 10
Once the Notification & Action center has opened upHere you can pin or unpin the Quick Action buttons, rearrange them or add or remove Quick Action button using the “+Add” link.You also choose to add or remove the Brightness slider here.Once done, click on Done.
In earlier Windows 10 versions, you saw this.
To re-arrange the Quick Action buttons, you had to drag and drop them to the locations you want. If you wished to add or remove some of the buttons, you had to click on the Add or remove quick actions link to open the following window.
Toggle the slider to the Off position if you want to remove a quick action, and to the On position if you want to display a quick action. If you do not use these buttons, you can also disable the Quick Action icons. If you wish, you can even go a step further and disable the entire Notification and Action Center – which of course is not advisable. This post will help you if you want to reset Quick Actions in Action Center.