How to change Default gateway in Windows 11/10 using Windows Settings
To change Default gateway in Windows 11/10 using Windows Settings, follow these steps: To know more about these steps, continue reading. First, you need to open the Windows Settings panel. Although there are so many options, you can use the Win+I keyboard shortcut. Then, switch to the Network & internet tab on the left-hand side. Here you can find all the internet sources, including Ethernet, mobile hotspots, WiFi, USB tethering, etc. You need to select the internet source that you want to change the Default gateway for. After selecting, you can see an option called IP assignment. Find the Edit button and click on it.
By default, it is set to Automatic (DHCP). You need to expand the corresponding drop-down menu and select the Manual option.
Then, you can see two options – IPv4 and IPv6. You need to toggle the IPv4 button to turn it on. For your information, this step is mandatory only when you haven’t enabled IPv4 earlier. Otherwise, there is no need to go through this specific step.
After that, find the Gateway option. If you have already entered the gateway earlier, you need to remove the existing one and enter the new one. Otherwise, you can click on the corresponding box and start typing the new Default gateway. Finally, click the Save button to save all the changes. Like the Control Panel method, you do not need to restart your computer since this change is applied as you click the Save button.
How to change Default gateway in Windows 11/10 using Control Panel
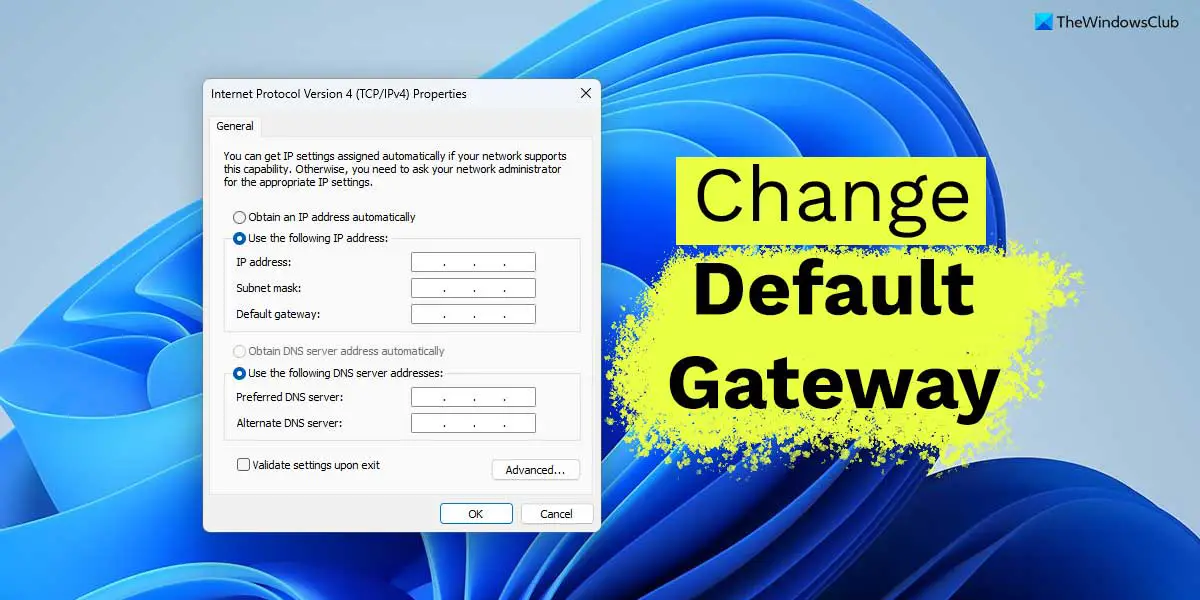
To change Default gateway in Windows 11/10 using Control Panel, follow these steps: Let’s find out more about these steps. First, you need to open the Network Connections panel on your PC. For that, press Win+R to open the Run prompt, type ncpa.cpl, and hit the Enter button. Next, right-click on the internet source and select the Properties option. Then, double-click on the Internet Protocol Version 4 (TCP/IPv4) option.
Following that, you need to find the Default gateway box. However, if it is grayed out, you need to select the Use the following IP address option. After that, you can enter the Default gateway as instructed by your ISP. Finally, you can click on the OK button to save the change. Once done, your internet source will start using the new Default gateway as you entered. Read: How to Enable or Disable Wi-Fi and Ethernet adapter on Windows 11
How do I change my gateway settings in Windows 11?
There are two ways to change the gateway or Default gateway settings in Windows 11. You can use the Windows Settings panel or the Control Panel. It doesn’t matter if you want to change it for an Ethernet connection, WiFi, or anything else; you can use the same steps to get the job done. Both steps are mentioned above, and you can follow either of them as per your requirements.
How do I find my gateway on Windows 11?
To find the existing Default gateway on Windows 11, you need to open the Network Connections panel first. Then, right-click on the running network and select the Properties option. Next, double-click on the Internet Protocol Version 4 option and head to the Default gateway option. You can find an IP address-like number in the corresponding box. That’s all! Hope it helped. Read: WiFi working but Ethernet not working in Windows.