Windows Upgrade Assistant keeps reinstalling itself & forcing Windows Installation
In one of the cases, we noticed that even when a user rolls back to the previous version, the upgrade assistant gets notorious. Even when the user tries selecting the “Defer upgrades” option, it doesn’t stop the upgrade assistant to reinstall the latest version of Windows 11/10.
Disable Windows 11/10 Update Assistant permanently
Since Defer upgrade is also not working for you, its best to disable the Windows 11/10 Update Assistant permanently, and chose to update manually whenever you think the time is right for you. The first two temporary solutions, whereas the third one is of a more permanent nature.
1] Uninstall Windows Upgrade Assistant
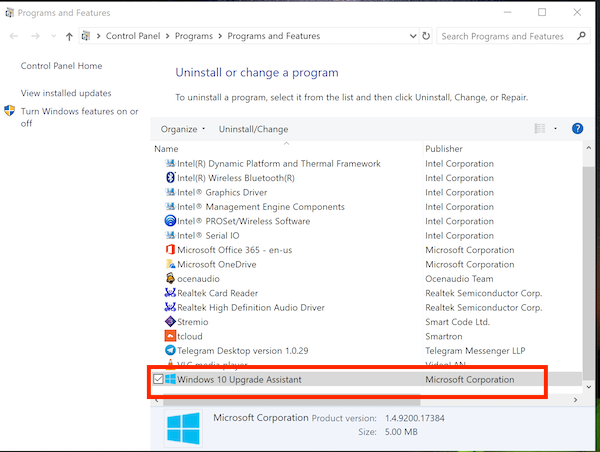
Press WIN + R to open run prompt. Type appwiz.cpl, and hit Enter.Scroll through the list to find, and then select Windows Upgrade Assistant.Click Uninstall on the command bar.
After this, navigate to the driver where you have installed Windows. It’s usually C Drive. Look for a folder named as Windows10Upgrade. Delete it, and empty the Recycle bin. Restart your computer, and hopefully, this should fix your problem.
It is possible that Windows might just install this program again by itself. So make sure to check once a while, and if it appears in the list again, just uninstall it.
2] Stop Update Orchestrator Service
The Update Orchestrator Service manages Windows Update. It manages Windows Updates. If stopped, your devices will not be able to download and install the latest updates. If the upgrade assistant is annoying you a lot, it is best to stop this service. While we do not recommend you stop updates on Windows 10, it’s only when you understand that there is no other way out. Make sure to update your device when you have resolved the problem for which you decided to disable it.
Open Services.msc by typing in the same in the search bar.Scroll to find Update Orchestrator Service.Click on Stop.
You might not be able to change the Startup Type from Automatic to Manual or Disabled, but stopping the service should do the job for you.
3] Keep killing Windows Update Assistant
Now since the first method might just become too much of a headache, this solution can keep killing the Windows Update service every time it runs. It is a script that kills it and makes sure no progress is made to upgrade the system. Open Notepad, copy the script mentioned below, and save it on your desktop: Save the file as, say, WUAKiller.bat. After this, right-click on the file and run it as Administrator. You may see the command prompt once, and then it will minimize. To make sure it stays hidden, follow our guide on how to Run Batch Files silently. Don’t kill this bat file from anywhere, including Task Manager. In the end, I will again plug my point that Windows Updates are important and never disable the Update Assistant permanently. You should do it only when the situation is tough, and there is nothing else you can do about it. It is always a good practice to figure out the exact cause of the problem, especially when it is a major update of Windows. It is also a good practice if you want to delay the update for a while unless a more stable version is rolled out by Microsoft. Use this tip in that case.