Display Internet speed on the Taskbar
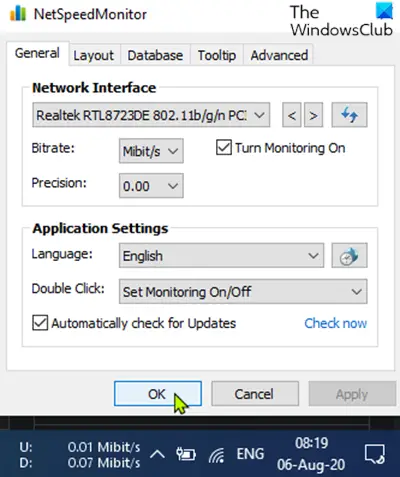
To display your Internet speed on the Taskbar in Windows 10, you’ll need to use a third-party app called NetSpeedMonitor. Do the following: Download NetSpeedMonitor and install the program. If it offers to install any bundled software, remember to uncheck the box and decline the offer. Note: Make sure that you have downloaded the correct program, though. The name of the file should end in x64_setup. If you use the one ending in x86_setup, it will not run on a Windows 10 machine, even if you run it in compatibility mode. If you see the error message below, you will need to run the app in compatibility mode. Once the program installs, a prompt will appear asking if you want to add the bandwidth monitoring toolbar to the taskbar, click Yes. If the prompt does not appear, navigate to the directory below and double-click nsmc.exe to invoke the prompt: A configuration window will open where you can make any changes to your language and network adapter. When they are correct, click Save. When you hit the Save button, the download and upload speed toolbar will appear on the right side of the taskbar; just before the system tray/notification area. Read: Fix slow Internet speed on Windows computer.
How to use NetSpeedMonitor
By default, NetSpeedMonitor measures your Internet speed using Kbit (Kilobits). You may want to change that to Mbit (Megabits) since most Internet Service Providers will report speeds in Megabits per second. To change this setting, do the following:
Right-click on the speed display on the taskbar.Select Configuration.Click on the drop-down menu next to Bitrate.Select Mbit/s.Click Apply.
When you open the configuration window, you can make other adjustments such as the font family, size, and toolbar alignment.