Increase phpMyAdmin upload size on XAMPP
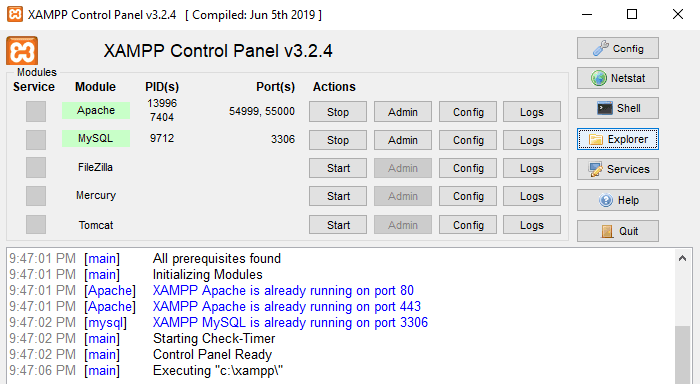
In order to increase the upload file size in phpMyAdmin, you first need to open the XAMPP Control Panel on your Windows device. Once it opens, move to the right end and click on the Explorer button.
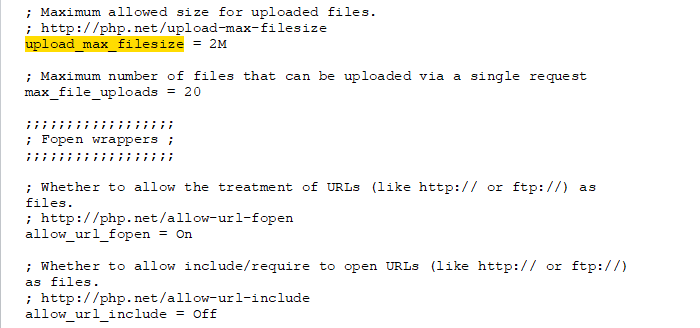
In the File Explorer, open the drive in which you have installed the XAMPP Control Panel. Most probably it would be the C drive. Locate the Xampp folder and then open it. Inside the XAMPP folder, search for the php folder and then double click on it. On the respective folder, search for the php.ini files. If you could find the file with the related name then open it. Otherwise, look for the file with the name “php” (INI-Production file), right-click on it and select Edit to modify it. Once you open the file in your preferred text editor, you need to locate upload_max_filesize and change its value with any arbitrary size you need. it is 2M when you install the Xampp server For example, in the below snapshot, you can see the value of the upload_max_filesize. It is by default 2M when you install the XAMPP server. I have increased the upload size to 25MB.
In the same way, type post_max_size in the navigation field, and then search it. Once you find, change its value as per your need. After that, save and close the file. Now, move to the XAMPP Control Panel and click on the Stop button for MySQL and Apache. Thereupon, start both the MySQL and Apache server again. Once you complete the above procedures appropriately, you would now be able to upload large database files on MySQL phpMyAdmin. That’s it.