When you use Excel, the page breaks are inserted automatically depending on the paper size, scale, and margin options. Well, if in case the default settings won’t work with your requirements or preferences, then you can opt to insert the page breaks manually. This is very helpful, especially if you are printing tables and need to know the exact number of pages needed or where to separate documents.
How to Insert, Move or Delete Page Breaks in an Excel Worksheet
Here are the steps to follow when you want to insert, move, or delete page breaks in a Microsoft Excel worksheet.
Insert a Page Break in ExcelMove a Page Break in ExcelDelete a Page Break in Excel
If you do anything that has accidentally changed what you do not need, press Ctrl + Z to reverse.
1] Insert a Page Break in Excel
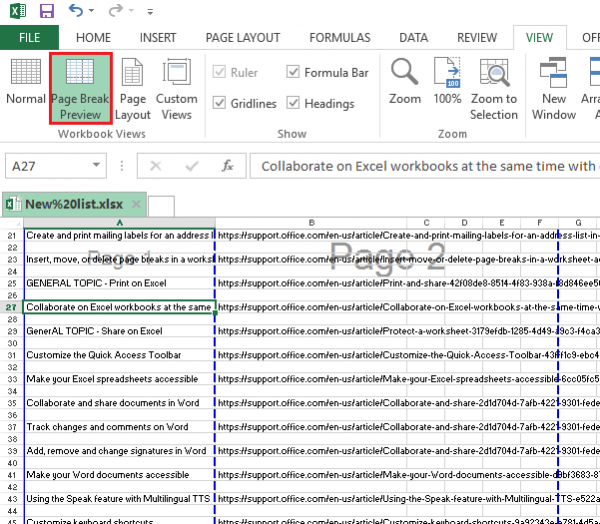
Open the View tab, go to the Workbook Views tab, and click on Page Break Preview.Choose the column or row you want to insert the page break.
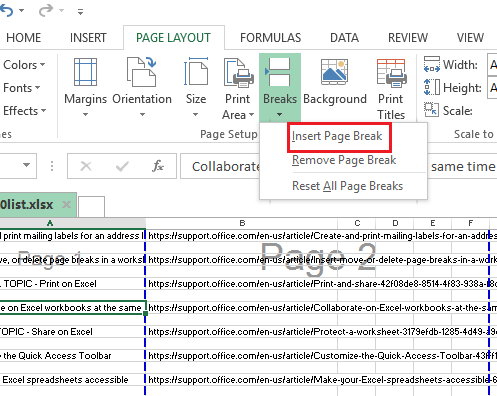
Go to the Page Layout tab and click on Breaks found under the Page Setup tab. Finally, click on Insert Page Break.When you have inserted the page break on the desired location but would still want to change or delete the page breaks that were set u.Click on View from the drop-down menu and then choose Page Break Preview.Under Page Break Preview, you can now drag each page break freely.Drag the page break right onto the preview edge if you want to change or delete chosen page breaks.
Here are the steps to follow if you want to create a vertical page break:
Place the cell pointer to highlight Row 1 to the right of the column where you would want to place the page break. Go to the Excel menu and then choose the Insert Page Break option.You will then see a vertical line on your worksheet which indicates where exactly the page will break.
If you want to make a horizontal page break, here’s what you do:
Place the cell pointer in Column A or right below the row on which you want to insert the page break.Go to the Excel menu, and then select Insert Page Break. You will see a horizontal line across the worksheet that indicates where the page will break.
When you check on the Page Break Preview option under the status bar, you will see the actual result or where the page breaks would appear once the document is printed out. This will also show the changes you made to the document. Read: How to customize the Quick Access Toolbar in Excel to make it work for you.
2] Move a Page Break in Excel
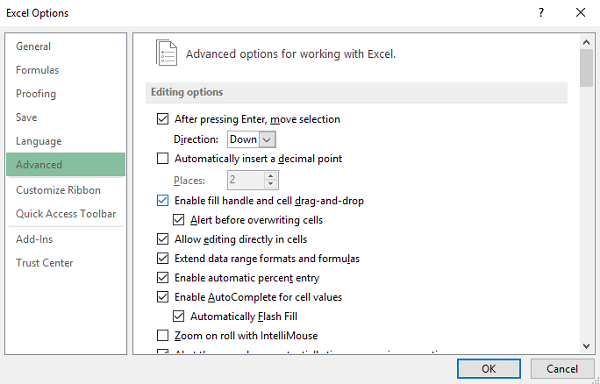
Click the File tab and then on Options.Among the tabs on the left-hand side, click on Advanced and check the box corresponding to Enable fill handle and cell drag-and-drop.
Open the worksheet you wish to modify.Click on View and then on Page Break Preview.To move a Page Break, just drag it to a new location.
3] Delete a Page Break in Excel
On the View tab, click on Page Break Preview.Select the row or column of the page break you intend to delete.Go to the Page Layout Tab and click on Breaks. Select Remove Page Break. It will delete the page break you selected earlier.
Conclusion I hope the post was easy to follow, and you were able to insert, move or delete Page Breaks in an Excel Worksheet.
What is the Page Break shortcut in Microsoft Office Excel?
You can view Page Break Preview (Alt + WI). Press (Alt + WN) to revert to Normal view. If you want to add a page break, select the row quickly and press Alt + P + B + I to insert the page break. Depending on the layout, you can add page breaks in both vertical and horizontal modes.
Why is page break used?
The purpose of a page break is to end a page without filling it with text. You should insert a page break after the date on your title page to separate it from the signature page.