But do you know that you can even install the Chrome browser using a simple command-line? Doesn’t it sound interesting? In this guide, we will explain a pretty easy way to install Google Chrome using Windows PowerShell.
Install Google Chrome using PowerShell
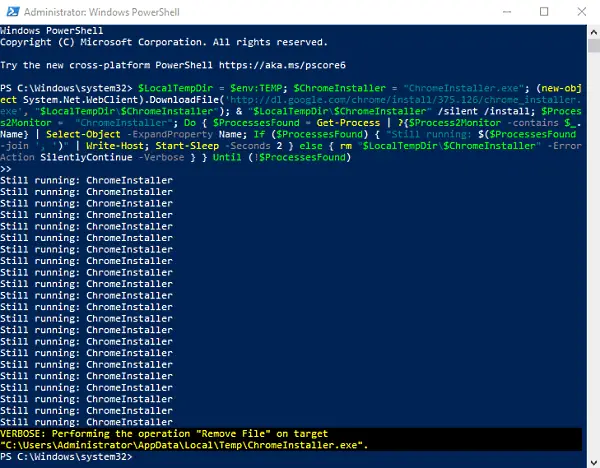
As we know that the default browser of a Windows Operating System is Microsoft Edge. If you plan to install Chrome using Windows PowerShell, then here is the method using which you can do it. Click on the Start button and type PowerShell. Right-click on the Windows PowerShell and select Run as administrator. If UAC prompts on the screen, click on the Yes button to give your consent. When Windows PowerShell page opens, copy and paste the following command-line: Press the Enter key and wait till it finishes.
Also, make sure your Windows 10 computer system is connected with the internet connection otherwise, it won’t work. In a few seconds, the Chrome browser will get installed on your computer. I hope this article would be helpful for you. Now read: How to open Chrome or Firefox using the command line.