Placing an image in a selection can be used to place images on surfaces at almost any angle. With the use of other tools such as Warp and Distort, the image can be made to fit anywhere. You may want to fit an image on a shirt or another piece of clothing that may be crumpled. This is one of the methods that can be used to accomplish that.
How to paste an Image into a Selection in Photoshop
The ability to place an image into a selection in Photoshop, allows you to be able to place images on photos of phones, tablets, and televisions. This is useful for cases where you want to add images to screens to give a device the appearance of being in use. You may want to add an image to the mockup of a billboard to see what it would look like. The image can be then adjusted with the free transform tool and the Perspective tool, to fit the angle of the image it is going on.
1] Place images in Photoshop
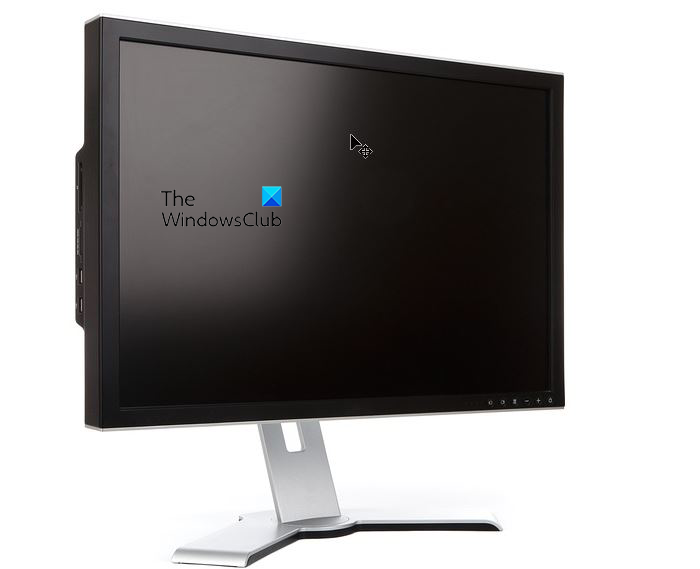
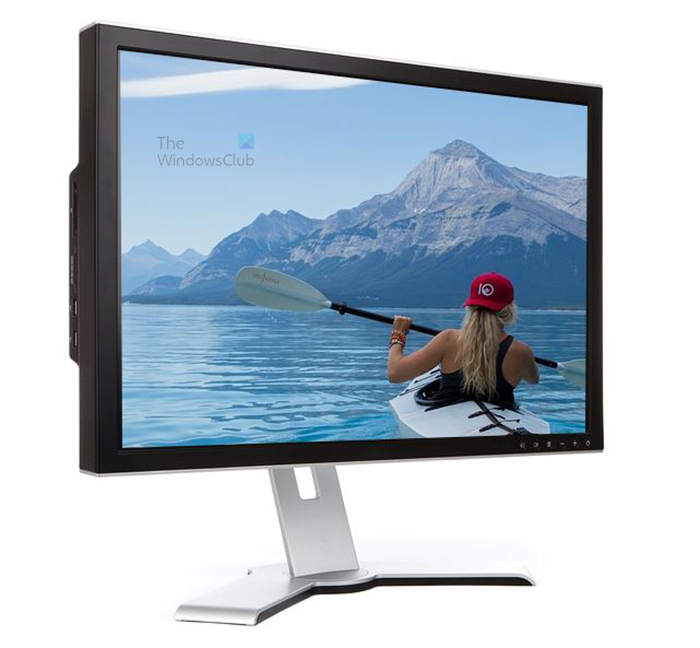
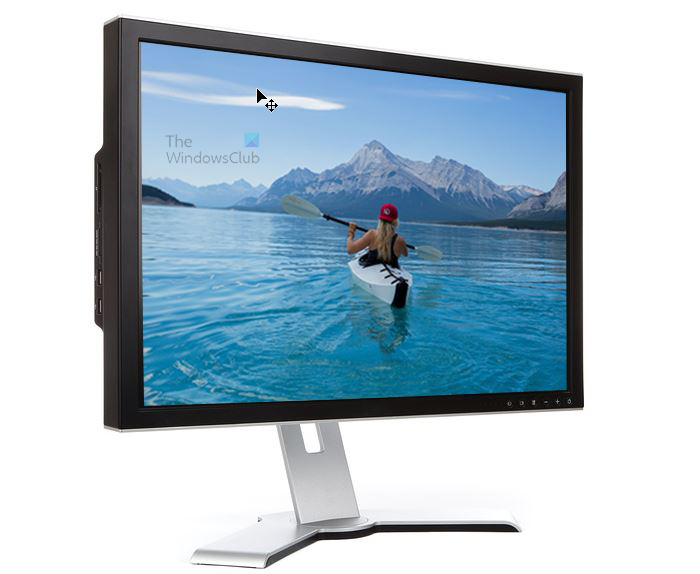
To start the process of placing the image in the selection, you will need to get the images into Photoshop. In this article, the objective will be to place an image on a screen. To get this done, place the image of the screen and the image that you want on the screen into Photoshop. Both can be placed into separate documents to make the copy and pasting easier. However, both can be placed into the same document, and then use the Marquee tool to select the image that you will be pasting. The images can be placed in Photoshop by finding the image then right-clicking on it and going to Open with then Adobe Photoshop (version). You can also open Photoshop then find the image and drag it into Photoshop. You can also open Photoshop then go to File then Open. A dialogue box will pop up, search for the image, select it then click Open. This is a monitor where the other image will be placed. This monitor was chosen because of the angle of its screen. It offers the opportunity to show you how to use other tools to make the image fit perfectly. This is the image that will be placed into the selection on the monitor.
2] Select the spot to paste the image
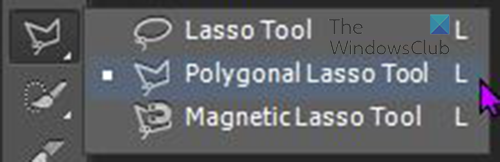
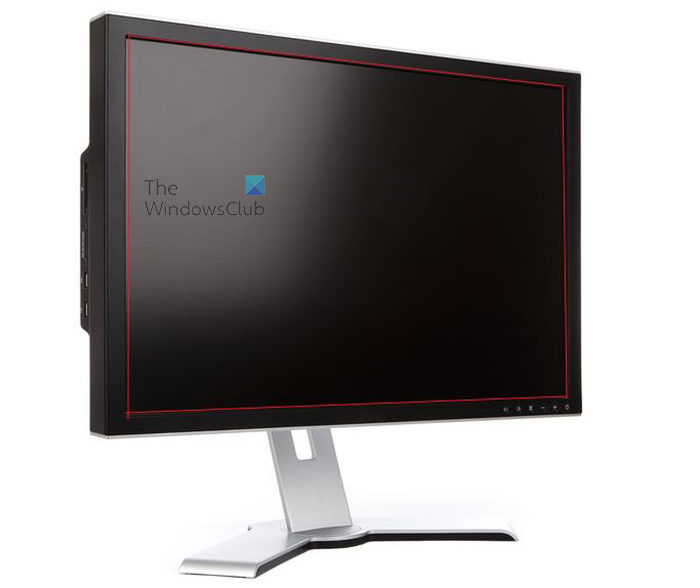
The next step is to select the spot where you want the paste the other image. note that the selection can be anywhere, and the picture can be pasted into it. The other objects such as the monitor just facilitate the artwork. In this article, the image to be pasted will be placed on a monitor so the selection will take the shape and angle of the monitor. To get the selection, select the Polygonal Lasso tool from the left tool menu. The Polygonal lasso tool is in the same group as the Lasso tool. With the polygonal lasso tool selected, go to the screen of the monitor, and select the outer edge of the back screen. Select one spot and go around until you reach the starting spot. The polygonal lasso tool works by clicking and not dragging. Click and create lines as straight as possible. In the case of the monitor, you would have to just make five clicks to form four connected lines. The first click is to lay down the first anchor point, the other clicks will form straight lines to lead back to the original point to close the selection. The red outline is just there to show the path of the Polygonal lasso tool. When you create a selection with the Polygonal lasso tool, ensure that the ends meet when you are closing the selection.
3] Copy the image
Now that you have selected the spot on the image where you want to paste the second image, it is now time to copy the other image. If the second image is in another document in Photoshop, go to that document and click on the image layer. Go to the top menu then click Select then All or press Ctrl + A. you will see a selection around the image, go to Edit then Copy, this will copy all in the selection. If the image to be copied is in the same document, use the Rectangular Marquee tool to select it then press Ctrl +C.
4] Paste the copied image into the selection
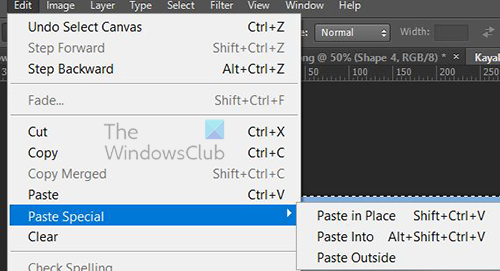
With the selection made and the other image selected, it is now time to paste the image into the selection. Click on the selection and go to the top menu bar and press Edit then Paste special then Paste into or press Ctrl + Shift + Alt + V. This is what the outcome will be, it may be different in your artwork. The outcome is like this because of the angle of the screen. This means that some more work will be needed to make the image fit properly. If the angle of the monitor with the selection was straight, then it would require less work to make it fit. The image is also zoomed in so that some parts are cut off, if that is ok with you then you can leave it that way, if not you can scale down the image. You will also notice that the edges of the image are not aligned with the edge of the monitor, those can be fixed.
5] Adjust image size in the selection
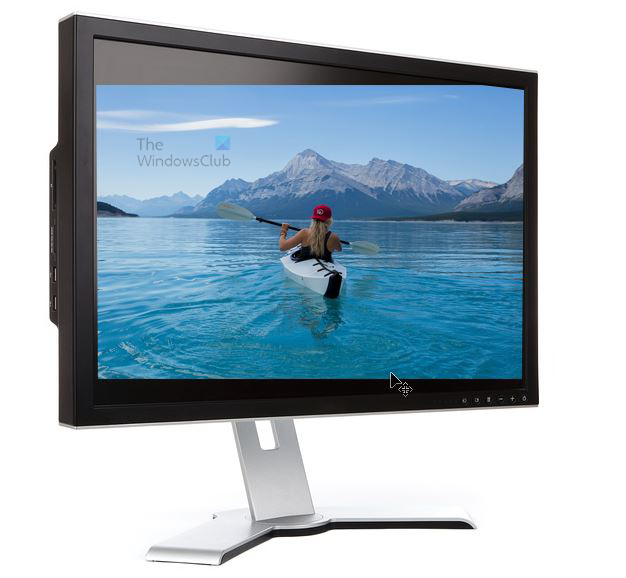
Now that the image is in the section, it is time to adjust the size if it needs to be changed. To change the size, go to the layers panel and click on the image. Press Ctrl + T to bring up the Transform box around the image. this will be used to adjust the size of the image. While the image was larger than the selection that it was pasted in, it seemed to be aligned properly. If this is ok for you then you can keep it like that. However, if you want to show more of the image and you resize it, you will notice that the image does not fit into the frame properly. This can be fixed using a combination of the Perspective and the Distort. Perspective tool
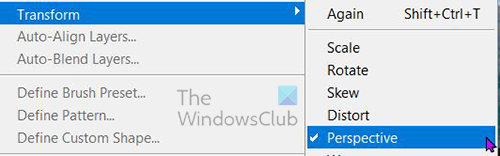
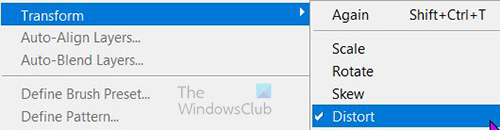
Perspective is an effect in Photoshop that allows you to angle/turn artwork to fit a certain viewpoint. Perspective is a method that works similarly to distort, however, it does not allow independent movement but allows the movement of points together. For example, moving the top left point will move the bottom left point. this affects the lines connected as well. This is good because it allows points and lines to be moved in close relation to each other. On the other hand, it can be hard to use in cases where tight and precise movement is needed. In this case, the Distort or warp tool can be used. To access the perspective go to Edit then Transform then Perspective. You will see the transform box appear around the image. You can grab any of the four handles and adjust the image to fit the perspective of the monitor. As you draw one handle another goes in the opposite direction. For example, if you move the top left point up the bottom point will go down and if you move it down the bottom left point will go up. If you move the same top left point to the left or right the top right point will move in the opposite direction. These movements are good, however, there is a point when you want only the selected point to move, and this is where the Distort comes in handy. Distort When you have reached a point where the perspective tool has done all that it can, it is time to use Distort. Distort will make only the selected point move while the others stay in place, unlike the Perspective tool. To use Distort, select the image, and go to Edit then Transform then Distort. You will now hold and drag any of the four corner points and move them in whatever direction you need them to go. They will move independently, and their corresponding points will not move/ if you hold and move any of the four center points, they will move the points that are above and below or to the left and right. Final adjustments When you are finished using Distort, check closely to see that the image is aligned properly. You may have to go back and use Perspective or Distort to do some final adjustments. You may realize that the selection that the picture was pasted into needs some adjusting. You can adjust it by clicking on its icon beside the image and you will be able to make some edits. You can press Ctrl + T to bring up the transform box around it and you can resize it. Your outcome will be different depending on the images that you used. You may need to make other adjustments such as sharpening or adding some lighting or blurring to areas to make it more realistic. This is the final image with the adjustments made. Read: How to insert Image into the desired Shape in Photoshop.