The Perspective Grid tool gives the rectangular object a look, as though, it eventually vanishes and goes on forever. The Perspective tool with the vanishing point mimics real-life objects like walls and fences, rectangular flat surfaces, etc. this is important in situations where you may want to put up objects or graphics on a wall or flat surface and want to see what it will look like. The perspective grid can be used for many things, engineers may use them to design structures for projects. They can be used for package designs where the mockup of a package is used, and the label added. This will show how it would look when it is created. Companies that do graphics on vehicles and buildings can use the perspective graph to do a mockup of these items with graphics on them to show clients what their work will look like when it is finished. Persons who do landscaping can use it to create digital designs to show clients or for reference before a project. There are so many applications in which the Perspective graph can be used.
How to use the Perspective Grid Tool in Illustrator
The Perspective grid tool with the vanishing point allows the user to see what their work would look like on a surface like a wall or any surface. This tool can be used by graphic designers who would wrap vehicles in vinyl art. It can also be used by building designers or decorators who need to see what their work would look like. This can also be used by persons who design product packages. The mockup gives a way to view the designs before doing the expensive work with real materials. Designers and engineers can show clients what the designs will look like so that changes can be quickly made before the actual project is done. Using the perspective grid is one way to use Photoshop artwork in Illustrator. You can create the artwork in Photoshop and place it in Illustrator on the perspective grid. You could change the Photoshop artwork to vector and then use it on the Illustrator perspective grid.
1] Accessing the Perspective grid tool
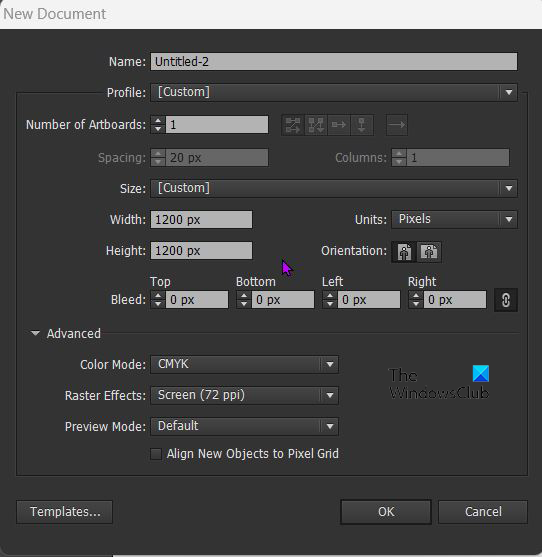
To use the Perspective grid tool, open Illustrator and open a new document by going to File and then click New. The New document options window will open, pick the options that you want then press Ok to confirm. To add the perspective tool to the document, go to the left Tools panel and click the Perspective grid tool. It is usually located under the Shape builder tool. You can also click the shortcut Shift + P on the keyboard. You can also open the Perspective tool from the top Tools menu. Go to View then Perspective grid and then click Show grid or press Shift + Ctrl + I on the keyboard. When you go to the top menu and choose View then Perspective grid then Show grid, the default Perspective grid that comes up is usually the Two point perspective, however, if you had opened any other view before then the default would be the previous one that was opened.
If you want a specific Perspective grid to open, then choose it from the drop-down menu at the top instead of just choosing Show grid. So it would be View then Perspective grid then click on the perspective you want. For example, if you go on One point, a menu will slide out with [1P – Normal view], click it and the One point perspective grid will be placed on the canvas. You can only have one perspective grid per active Illustrator document so plan and choose the one that will fit your project.
2] Understanding the Perspective grid tool
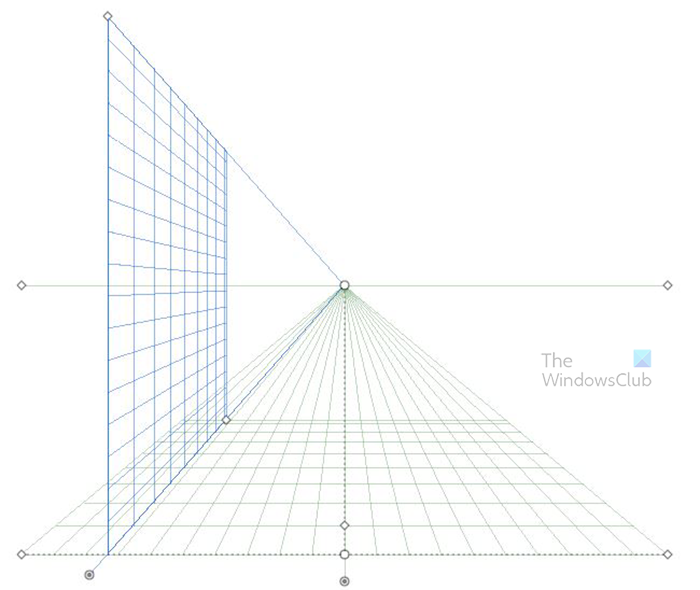
The Perspective tool is great for drawing artwork to look like it would on objects in the real world. From knowing what a label would look like on a package to what advertisements would look like on large buildings or vehicles, the Perspective tool can help with that. The Perspective tool offers three Perspective grid presets, they are One point perspective, two point perspective, and three point perspective.
This is the One point perspective grid. This is the two point perspective grid.
This is the three point perspective grid.
3] Parts of the Perspective grid
The Perspective grid tool has important parts that have important functions.
A. Plane switching widget – Clicking on the different sides of this widget will change the active plane (side) of the grid. B. Left Vanishing Point – This is the point on the left where the grid looks like it is vanishing into nothing, this is where all the grid lines meet. You can grab this point and move the grid point in or out horizontally. C. Vertical Grid Extent – This is the point that you can click and drag to make the grid taller or shorter. D. Perspective Grid Ruler – This ruler is used for measurement and can be used when you want precise measurements. E. Right Vanishing Point – This is the point on the right where the grid looks like it is vanishing into nothing, this is where all the grid lines meet. You can grab this point and move the grid point in or out horizontally. F. Horizon Line – This is the line that shows the horizon (horizontal line). G. Horizon Height – This is the distance between the horizon line and the ground level. H. Ground Level – This is the left ground line, it can be used to move the whole grid on the canvas. I. Horizon Level – This is used to adjust the horizontal line of the grid. J. Extent of Grid – If this is moved closer to the grid it decreases the vertical and ground lines of the grid. If It is moved away from the grid it will replace them or increase the amount right up to where the last vertical lines are. K. Grid Cell Size – This is used to make the cells of the grid bigger or smaller. Move up to make them bigger or down to make them smaller. L. Ground Level – This is the right ground line, it can be used to move the whole grid on the canvas. M. Extent of Grid – If this is moved closer to the grid it decreases the vertical and ground lines of the grid. If It is moved away from the grid it will replace them or increase the amount right up to where the last vertical lines are. N. Right Grid Plane Control – Hold and move to the left or right and the right plane (side) will move in the direction you move the control. It can overlap the sides or pull them apart. O. Horizontal Grid Plane Control – Control the up or down movement of the grid. You can use this to make the grid shorter and also change the angle of the ground level. P. Left Grid Plane Control – Hold and move to the left or right and the left plane (side) will move in the direction you move the control. It can overlap the sides or pull them apart. Q. Origin – Hold and move up or down left or right to change the origin point of the grid.
4] Drawing on the grid
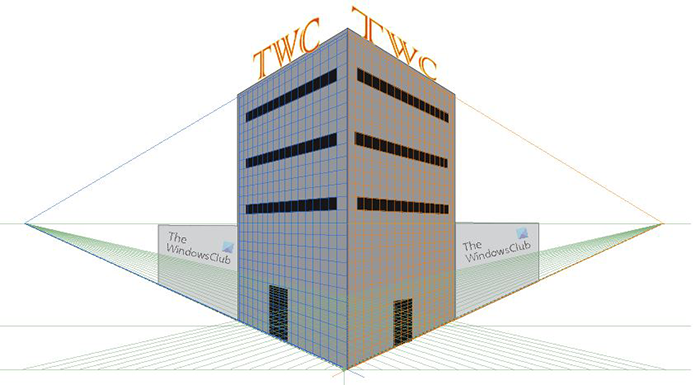
The Perspective grid is used to show the perspective of the artwork. It will allow you to see what artwork will look like on walls or floors. This artwork can be a mockup of signs, decorations, labels, etc. There are two ways that you can draw on the Perspective grid you can choose to click a tool and draw directly on the grid. This is best if you are just doing flat drawings. You may also draw on a separate place and then drag the artwork on the Perspective grid. This is best for more detailed drawings You can do artwork from Photoshop or other sources, open it in illustrator and drag it on the Perspective grid. To drag it on the grid, select the Perspective selection tool then click and drag the object onto the grip. You would need to make sure to activate the plane (side) that you want the artwork on. The good thing about having the grid is that you can use them to align your artwork properly. You can create a wall artwork in Photoshop or find it online, you can then place it on the perspective grid and place artwork of a sign that you would want on it. This will give you an idea of what your work would look like on a wall in the real world. Remember to click the side of the Plane switching widget that would correspond with the side of the grid. You then use the Perspective selection tool to fit the artwork on the active side of the grid. To temporarily use the Perspective selection tool. Click Ctrl while using the Perspective
This is the artwork on the Perspective grid with the grid lines showing.
This is the artwork without the Perspective gridlines showing.
5] Turn off the Perspective grid
When you are finished with the perspective grid, or you just want to see the artwork without the grid for a while, you want to turn it off. There are two ways to turn off the Perspective grid. The first method to turn off the Perspective grid is to go to the top tool menu and press View then Perspective grid then Hide grid. The other method to turn off the Perspective grid is to hover over the X on the Plane switching widget until the cursor turns into a hand then press the X and the Perspective plane grid will close. You can also turn off the Perspective grid by pressing Ctrl + Shift + I.
6] Locking the grid
To prevent certain movements, you can lock the grid. To lock the grid go to the top menu and choose View then Perspective grid then choose the lock you want to apply, either Lock grid or Lock station point. Lock Grid: This option restricts the grid movement and other grid editing when you’re using the Perspective Grid tool. Only the visibility and the plane position can be changed. Lock Station Point: When the Lock Station Point option is checked, the vanishing points move in sync. If not checked, the vanishing points move independently, and the station point also moves.
7] Save
When the hard work is finished, it is time to save it. Before saving it in any other format, it is best to save it as an Illustrator.ai file so that you can edit it later. To save as an Illustrator.ai file go to File then Save as then the Save as dialogue box will appear. Enter the file name and then press save. Make sure that the file extension says .ai. To save the file as another format for example JPEG for online use or PNG to save without a background, go to File then choose Export. The Export dialogue box will appear, fill in the file name then choose the file format as JPG or PNG or any other format that is supported. Read: How to Rotate Guides in Illustrator and Photoshop
What does the perspective grid tool do in Illustrator?
The Perspective Tool is used to change the orientation of objects so that they look more realistic as they fit the perspective of objects around them. The orientation of objects with the vanishing point in perspective will make them look more realistic.
How do you use the perspective tool in Illustrator?
To use the Perspective Grid tool in Illustrator, you need to access the Tools panel first. Next, you can find three options – One Point Perspective, Two Point Perspective, and Three Point Perspective. You need to choose the correct option as per your requirements. In other words, you need to make use of the 3D model to get the job done.


