Manage and Safely remove USB drives
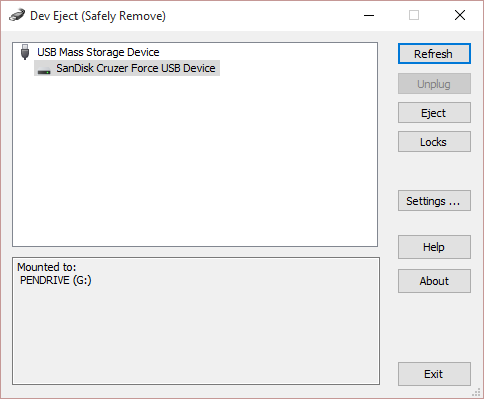
On the main form, Dev Eject displays a complete list of available USB devices and the available actions for them. For instance, if you want to eject a USB drive, you simply need to select that from the list and find the ‘Eject’ button from the right part and you are done. Using DevEject you can eject, plug/re-plug the USB devices. Moreover, you can hit the ‘Locks’ button to view all the files and processes opened from a particular USB drive. Dev Eject integrates into the system tray for easier access to it and it has also got a ‘Devices List’ that when enabled always stay on top of everything showing you all the connected USB drives in a small window. Now coming down to customization, the program is a bit customizable. You need to go to the ‘Settings’ to configure the program. There are a few basic settings that you can configure, you can choose the start-up mode (with Windows start-up or manual) and you can enable/disable the tray integration. Then you can manage the default click actions for the tray icon and devices list. For the tray icon, you get to choose between two click options, i.e. ‘Open Settings’ or ‘Short Device List’, and again for the devices list you get to choose between two click options, i.e. ‘Safely Mount/Unmount’ or ‘Open Volume’. Furthermore, you can configure the time at which the empty device list may close.
You can even manage, how the program receives updates and then you can even manage data logging and error reporting from the ‘Troubleshoot’ tab under settings. The program is easy to operate and useful though. The plug/re-plug functionality really comes in handy if you have any unresponsive devices connected to your computer. And moreover, the devices list is also a useful thing to have on the screen. Seamless tray integration and customizations also add up to features and make this program more usable.
Dev Eject for Windows – free download
Click here to download Dev Eject.