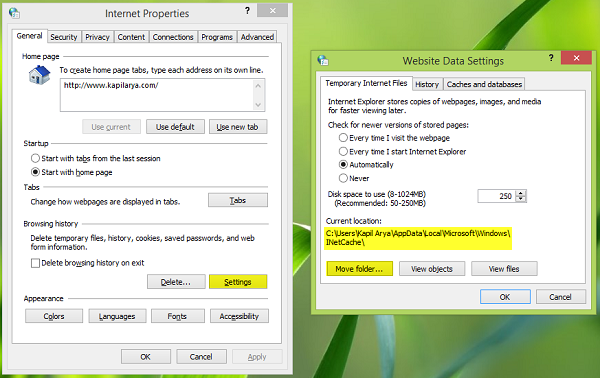
You can change the temporary data saving location in the following manner. Open Internet Explorer settings window or run inetcpl.cpl command. On the General tab of Internet Properties window, click Settings under Browsing History heading. On the Website Data Settings window, you have the option to move the temporary file location to your desired folder, refer to the below screenshot.
Recently, I have changed the temporary internet file location by following above-mentioned way, but when I tried to restore it back to default, it won’t work. I was unable to restore the temporary internet files folder. When it used Move to option to restore, the temporary files got generated into: location and not in default location. Resetting Internet Explorer didn’t fix this problem, so here is how to fix this, by editing the Windows Registry.
Restore temporary internet files folder for Internet Explorer
Press Windows Key + R combination, type put regedit in Run dialog box and hit Enter to open the Registry Editor.
Navigate here:
In the right pane of above-shown window, look for the registry string named as Cache. It must be showing the customized location you’ve provided to save temporary data. Double click on the same to get this:
In the Edit String box so open now, put the Value data which is the default temporary file storage location as following and click OK:
Next, go to the following registry key and make the same manipulation as we have done in the previous step for the Cache key: When you’re done, you may close the Registry Editor and reboot the machine to get your problem fixed. Let us know if this helped.